Xero is a cloud accounting software that you can access from anywhere and manage your small business.
You can do all the basic accounting activities in Xero like track expenses, create invoices, make pay runs, connect and reconcile your bank account and more.
With the use of third party apps that integrate with Hubdoc, Shopify, PayPal and hundreds more, you can make Xero even more powerful.
Starting at just $29/month, Xero is great for sole traders, small businesses and other established businesses of all sizes.
They offer a full 30-day free trial with all the features enabled. You do not need your credit card to activate the trial and you can purchase a plan at anytime.
In the section below, I’m going to show you the 6 simple steps to start your free trial.
How To Start Your Xero Free Trial
You do not need to enter your credit card information to start a free trial with Xero.
That means there is no reason for you not to try it. Starting a 30-day Xero free trial can help your business grow the right way so why not begin today.
Click the “Try Xero for free” button on the Xero site and then follow the steps below.
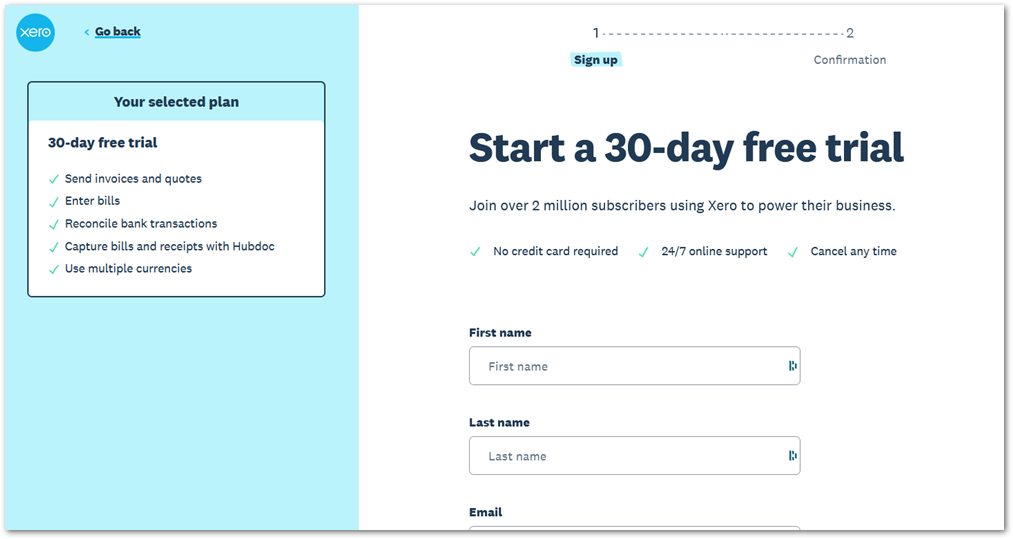
1. Enter your info (name, email etc.)

The first of two steps after clicking the sign up button is to input your information which includes your name, email address, phone and location before proceeding to the second step – confirmation.
Check boxes that indicate that you read the legal pages as well as confirming that you’re not a robot should be checked. There is also an optional checkbox which asks whether or not you would like to receive marketing emails.
2. Confirm your email

You’ll be asked to check your email to verify your account before continuing.
Xero sends an email to the email address you signed up with so make sure it’s a working email. You’ll need to go to your email and click on the link there to verify your address before you’re able to log in.
3. Verify your email

Checking your email account, a personalized email greets you with a button to verify that your email address is the right one.
Click on the button to finish setting up your Xero account.
4. Set your password

Verifying your email address takes you directly to a screen to set your password. This step activates your account.
5. Enter information about your business

One more step before you’re introduced to your dashboard and that is to add information about your business.
This information is used to customize your Xero account and tailor it to your needs.
Business name, country, currency, time zone, industry and number of employees are some of information asked for in this short questionnaire.
You can either click the “Buy now” or the “Start trial” button to get started.
6. Welcome to your Xero dashboard

You’re finally at your Xero dashboard and can start familiarizing yourself with everything you can do in Xero.
The “Getting Started” guide is front and center on the dashboard where you can watch a quick video explaining the main features and how to use them.
Below that, you’ll see cards that allow you to set up some of the most important tasks inside Xero – like connecting your bank and creating invoices.
And right at the top of the screen, you’ll see how much time remains in your trial and the option to purchase a plan.
Price of Xero After the Trial
Xero has three plans to choose from – Starter, Standard and Premium plans are $29, $46 and $62 per month respectively.
Each plan was designed for different size businesses ranging from sole traders to businesses with more complex needs.
You can also add addon features like claiming expenses, tracking projects and analytics for an extra fee billed each month.
Unfortunately, if you prefer to pay annually, there isn’t any option for yearly billing like most SaaS products.
Occasionally though, there are sales that will give you a discount on pricing for a period of time. At the time of this writing, there’s a sale going on for 50% off for 6 months reducing the price of each plan to $14.50, $21, and $31 per month for the next 6 months.
How Easy is Xero to Use?
Even with no accounting experience, Xero makes it very easy to use, providing guides, videos and an entire learning section making it great to run your business with confidence.
For example, when you first log in, there is a “Getting Started” guide right in your dashboard where you can view an overview video of the most useful features inside Xero.
The cards right below show you how to set up these features with useful links to:
- watch a video which pops up over your dashboard
- try using the feature in a demo version
- a guide where you can learn more about the feature.

These useful links allow you to master the use of Xero accounting during your 30-day trial making it great for beginners to accounting software.
Xero unlocks all features for you to try during the 30-day trial. When you choose a plan, you’ll only be able to use the features on that plan.
There is no credit card required to start the trial so you don’t have to worry about being billed automatically or even committing to using Xero.


